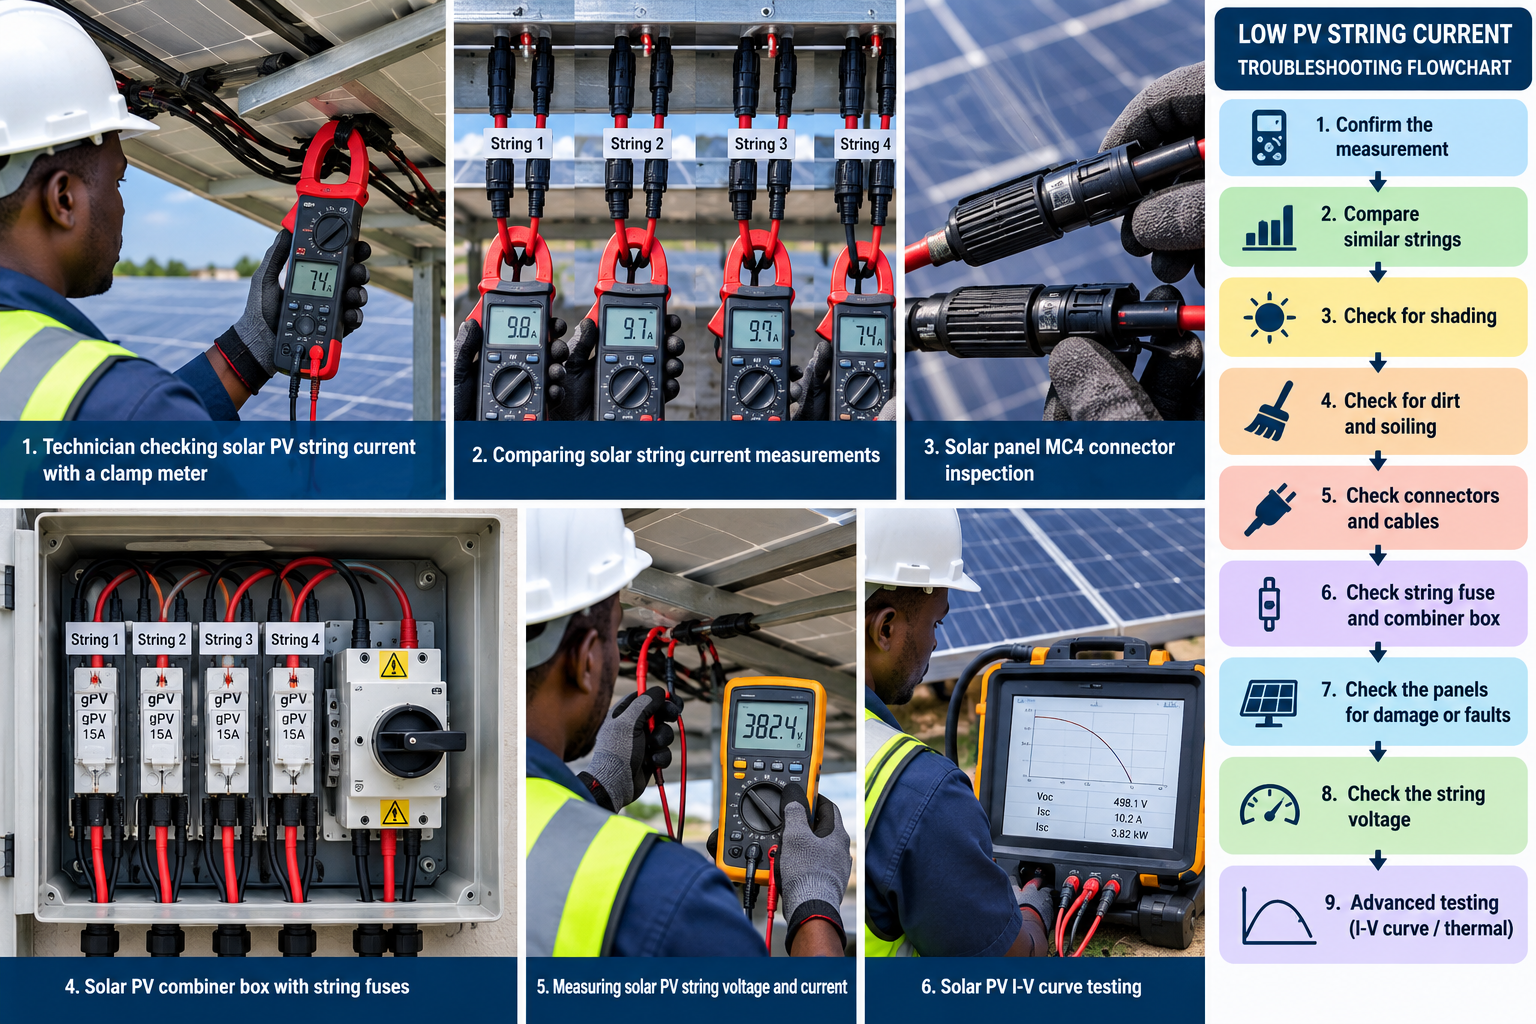
If one solar string is showing lower amperage than the other strings, but there is no obvious shading, do not immediately assume that the solar panels are bad.
A low-current reading can come from several different problems, including dirty panels, damaged modules, poor connections, string fuses, wiring problems, bypass-diode issues, or even an incorrect measurement.
The first step is to compare the affected string with a similar string under the same conditions.
For example, if several strings have similar panels, the same number of modules, the same direction, and similar sunlight, but one string produces much less current, that string deserves further investigation.
If your whole solar system is producing less power than expected, our guide on why solar panels produce low power covers the broader causes. This article focuses specifically on a different problem: one PV string showing unusually low current when obvious shading is not present.
What Does Low Current in a Solar String Mean?
Solar panels connected in series form a string. In a series string, the same current flows through the modules.
This means one weak part of the string can affect the current available from the whole string.
However, a lower current reading does not automatically identify the faulty component.
Solar irradiance, panel temperature, soiling, shading, module condition, wiring, connectors, inverter operating conditions, and other factors can all affect the reading.
This is why troubleshooting should start by confirming that the current difference is real.
1. Compare the String With a Similar String
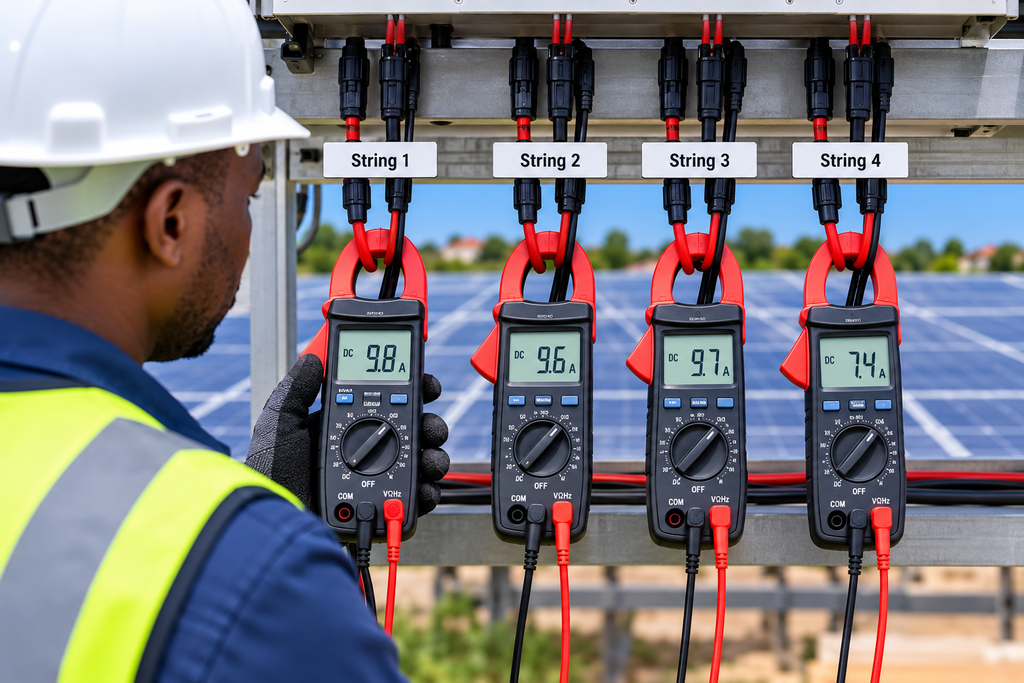
This is one of the most useful first checks.
Suppose you have four similar strings:
- String 1: 9.8 A
- String 2: 9.7 A
- String 3: 9.9 A
- String 4: 7.4 A
If all four strings have the same number and type of panels and are operating under similar sunlight, String 4 is an obvious outlier.
But the comparison only makes sense if the strings are actually comparable.
Check:
- Number of panels in each string
- Panel model and electrical rating
- Panel orientation
- Panel tilt
- Location on the roof
- Sunlight reaching each string
- Inverter or MPPT connection
- Operating conditions at the time of measurement
Different MPPT operating conditions can also produce different current readings, so a current difference alone does not prove that a component has failed.
2. Look for Shading That Is Easy to Miss
You may look at the panels and see no large shadow, but small or temporary shading can still affect production.
Check for things such as:
- Roof vents
- Water tanks
- Satellite dishes
- Poles
- Nearby buildings
- Trees
- Antennas
- Raised walls
- Other solar panels
- Shadows from nearby structures
Also check the system at different times of the day.
A shadow that is not present at noon may cross part of a panel in the morning or afternoon.
Partial shading can also affect the behavior of the solar array, especially when several modules are connected in series.
3. Check for Dirt and Uneven Soiling
A panel does not have to look extremely dirty before its output is affected.
Dust, bird droppings, leaves and other dirt can block some of the sunlight reaching the cells.
This can be especially important where panels are exposed to dust for long periods.
Also look for uneven soiling.
For example, if most panels in a string are clean but one panel has heavy dirt or bird droppings across part of its surface, that panel may behave differently from the others.
Clean the panels using the manufacturer’s recommended method and compare the string again under similar sunlight.
4. Inspect the Solar Panel Connectors
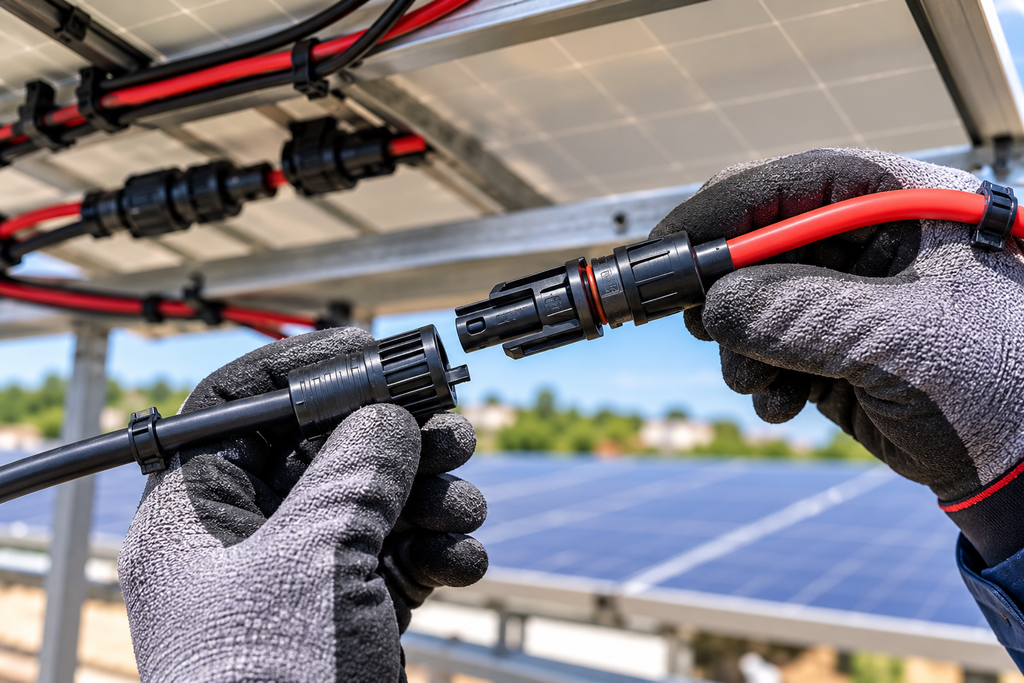
A poor connection can cause power loss even when the panels themselves are working correctly.
Possible problems include:
- Loose connectors
- Poorly crimped connectors
- Corrosion
- Damaged connectors
- Incompatible connector combinations
- Damaged cable ends
- Loose terminals in a combiner box
A high-resistance connection can cause a voltage drop and power loss while the system is operating.
A connection problem can sometimes produce heat, making thermal inspection useful during professional troubleshooting.
Our broader guide on why solar panels produce low power also covers loose connectors, cable problems and other causes of low solar output.
Do not pull apart or disconnect PV connectors on a live system just to investigate them. PV strings can remain electrically dangerous whenever there is sunlight.
5. Check the String Fuse
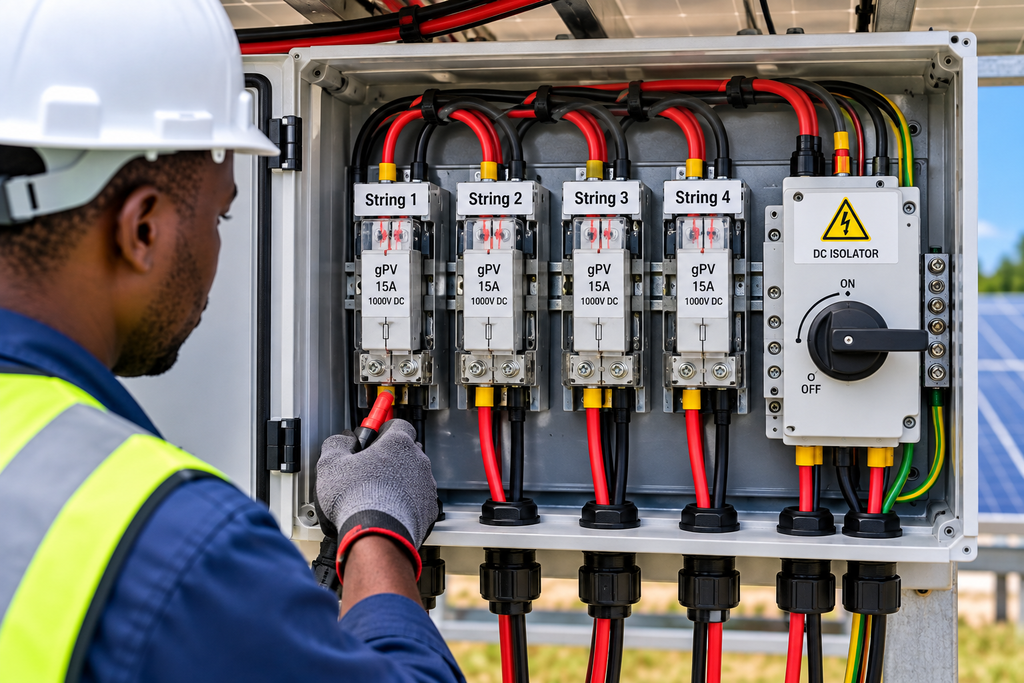
If the system has a combiner box with individual string fuses, the fuse should be included in the investigation.
A blown fuse can interrupt the current path.
Depending on where the voltage is measured, you may still see a plausible voltage reading even though the string cannot deliver normal operating current.
This is why checking voltage alone is not always enough.
If a string is producing almost no current, the technician should check the string’s current path, including the fuse, connections and wiring, using the correct safety procedure.
Never remove a fuse from a live PV system without following the proper isolation procedure and confirming that the equipment is safe to work on.
6. Look for a Weak or Damaged Solar Panel
One panel can sometimes be the reason an entire string performs poorly.
Possible problems include:
- Damaged cells
- Cracked modules
- Internal cell connection problems
- Junction-box problems
- Water damage
- Heat damage
- Physical damage
- A module that has degraded more than the others
A visual inspection can reveal some problems, but not all.
A panel can look normal from the outside and still have an electrical problem.
If the affected string continues to show abnormal current under stable sunlight, professional testing of individual modules or the complete string may be needed.
7. Investigate the Bypass Diodes
Solar panels normally contain bypass diodes in their junction boxes.
Their job is to provide an alternative current path around a shaded or affected section of cells.
A bypass diode can therefore become important when investigating unusual string behavior.
A diode problem does not always appear simply as “low current.”
For example, a shorted bypass diode can reduce the voltage contribution of part of a module. A faulty open diode can cause problems when the associated section becomes shaded.
Testing current, voltage and, where appropriate, the I-V curve gives a better picture than looking at current alone.
This is one reason why replacing a panel immediately after seeing a low current reading is not a good troubleshooting method.
8. Check the Number and Type of Panels in the String
Sometimes the problem is not a failed component.
The string may simply not be configured as expected.
Check whether:
- The correct number of panels is connected
- The panels are the expected model
- The string has been connected to the correct MPPT
- The panels have the expected orientation
- The wiring matches the system design
- A panel has been disconnected
- The positive and negative connections are correct
If one string has a different configuration from the others, comparing its current directly with the other strings can be misleading.
9. Check the Cables
The cable between the panels, combiner box and inverter should also be considered.
Look for:
- Damaged cables
- Loose terminations
- Poor crimps
- Corrosion
- Cable damage caused by heat or physical movement
- Incorrect cable connections
A damaged or high-resistance connection can cause power loss.
The problem may be difficult to find through visual inspection alone, particularly if the fault occurs only when the system is carrying significant current.
A qualified technician can use electrical measurements and, where suitable, thermal imaging to help locate the problem.
10. Make Sure the Measurement Is Correct
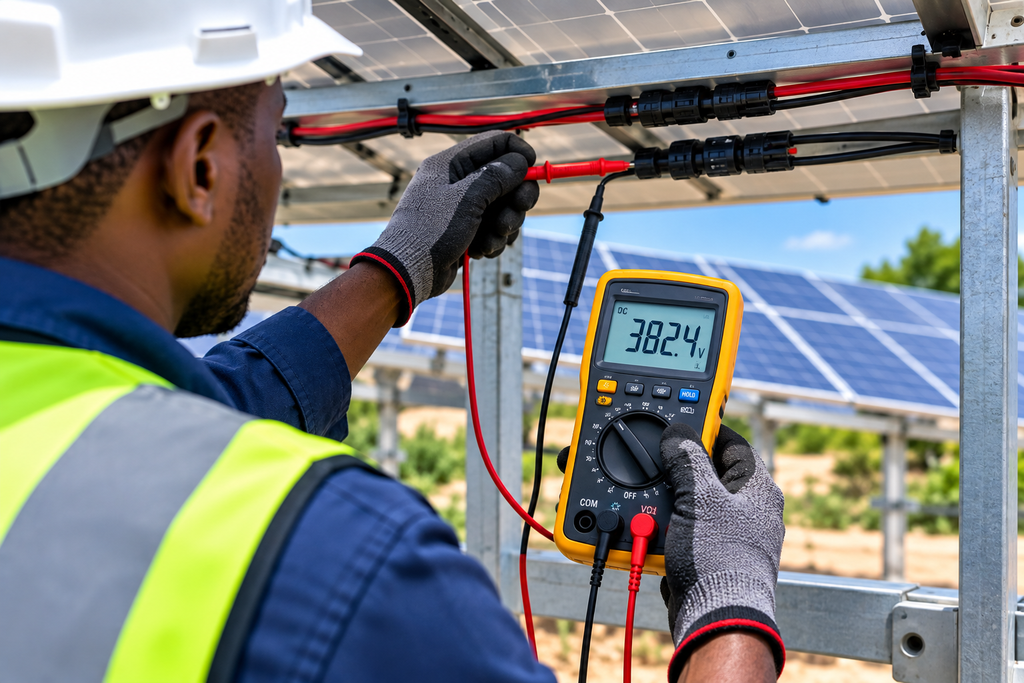
Before replacing anything, confirm that the current measurement itself is correct.
This sounds simple, but it is important.
For example, when using a clamp meter, the measurement method matters. If both the positive and negative conductors are inside the clamp at the same time, their magnetic fields can cancel and produce an incorrect reading.
The meter also needs to be suitable for the DC current and the electrical environment.
Make sure the technician is measuring the intended conductor and using the correct instrument and procedure.
11. Check the Inverter and MPPT Operating Condition
The inverter is another part of the investigation.
Two strings that appear similar may not always operate at exactly the same current if they are connected to different MPPT inputs or are operating under different conditions.
The inverter may also be limiting or changing its operating point.
That means you should not look at the current reading in isolation.
Check:
Current + voltage + irradiance + inverter operating condition
rather than just asking:
“Why is this string showing fewer amps?”
If the issue turns out to involve the solar array being too large or improperly matched to the controller, our Solar Charge Controller Calculator can be useful during system planning. However, a calculator does not replace the manufacturer’s actual voltage and current limits.
12. Check the Number of Panels Against the MPPT Range
An MPPT controller or hybrid inverter normally has a specific voltage range in which its MPPT can operate.
Your solar panel string needs to be designed to operate correctly within those limits.
Check the panel’s:
- Voc
- Vmp
- Isc
- Imp
Then compare those values with the inverter or charge controller specifications.
Do not choose panels only by looking at their wattage.
For a broader explanation of controller sizing, you can also read how many solar panels a charge controller can handle and use the calculator to get a planning estimate.
A Simple Troubleshooting Order
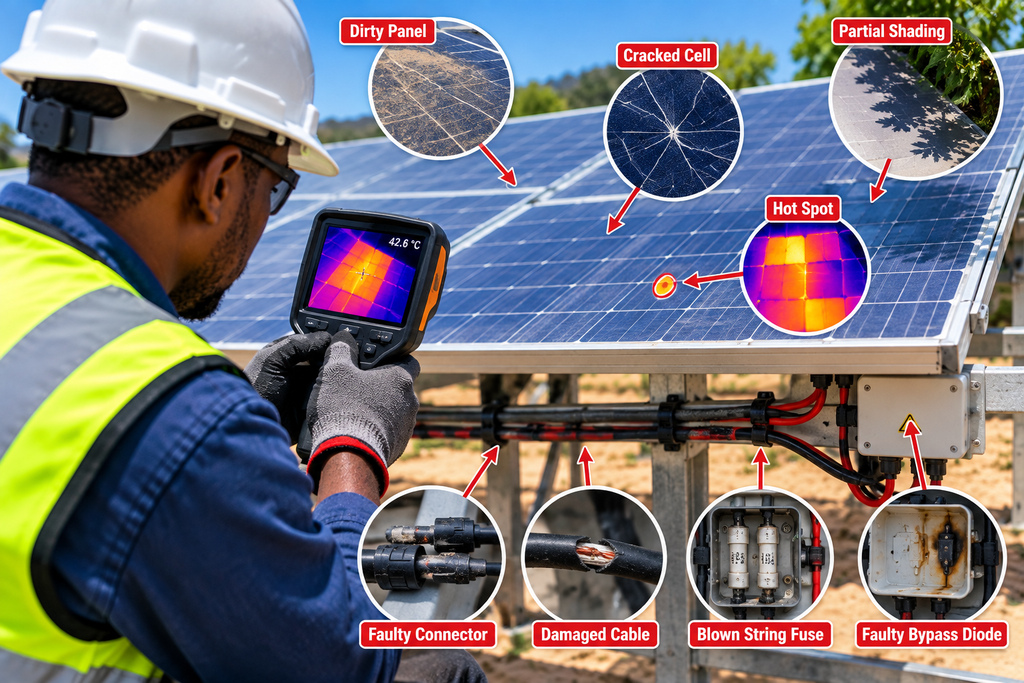
If one solar string has low current and there is no obvious shading, investigate it in this order:
Step 1: Confirm the reading
Make sure the meter and measurement method are correct.
Step 2: Compare similar strings
Measure comparable strings under similar sunlight and operating conditions.
Step 3: Check sunlight
Look for temporary or partial shading.
Step 4: Check the panels
Look for dirt, physical damage and other visible problems.
Step 5: Check connectors and cables
Look for loose, damaged, corroded or poorly terminated connections.
Step 6: Check the string fuse
Inspect the string protection and combiner-box connections using the correct safety procedure.
Step 7: Check the string voltage
Compare its voltage with similar strings.
A significant voltage difference can provide an important clue.
Step 8: Investigate individual modules
If the string remains abnormal, professional testing may be needed to identify a weak module or internal fault.
Step 9: Consider bypass-diode problems
If the measurements suggest a module or cell-substring problem, further electrical, thermal or I-V testing may be appropriate.
Low Current vs Low Voltage: Why the Difference Matters
One of the most useful things in PV troubleshooting is to look at both current and voltage.
For example:
| What you see | What it may point toward |
|---|---|
| Very low current and reasonable voltage | Shading, soiling, measurement issue or a current-limiting problem |
| Very low current and very low voltage | Open connection, fuse problem, wiring problem or more serious string fault |
| Normal current but lower voltage | Possible module, bypass-diode or string-configuration issue |
| Current changes when sunlight changes | Environmental conditions may be involved |
| Current stays abnormal under stable sunlight | Further electrical investigation is warranted |
| One string is consistently different from identical strings | Possible string-specific fault |
These are troubleshooting clues, not final diagnoses.
A single measurement cannot always tell you which component has failed.
When Should You Use an I-V Curve Test?
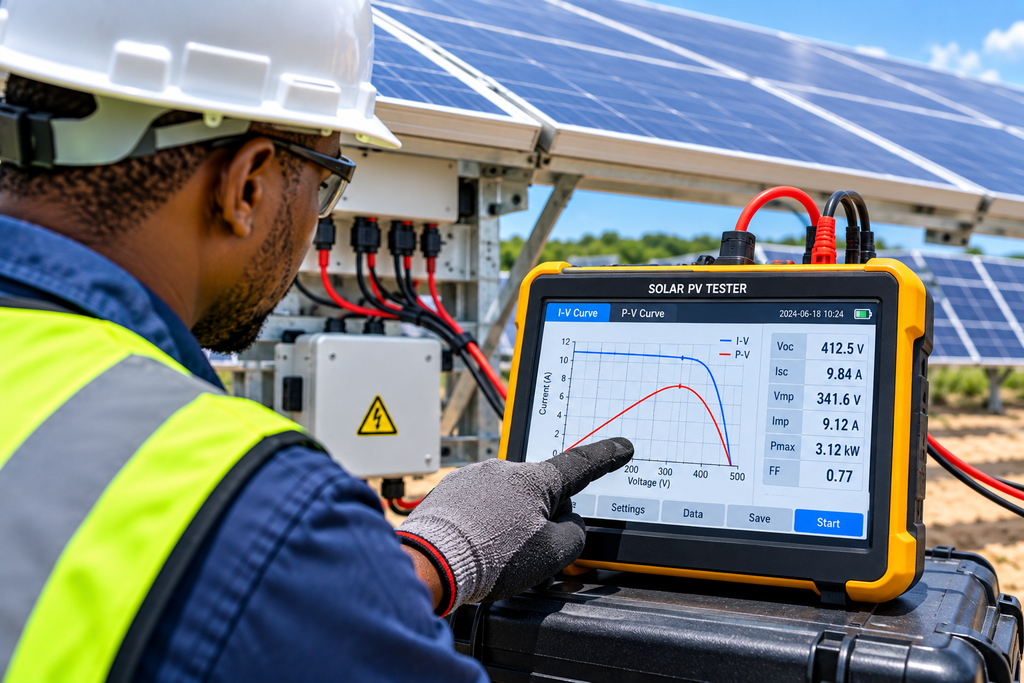
An I-V curve test can be useful when basic checks have not identified the problem.
It can help investigate issues such as:
- Partial shading
- Uneven soiling
- Module mismatch
- Damaged cells
- Bypass-diode problems
- Abnormal current
- Abnormal voltage
- String performance differences
The advantage is that you are not looking at only one number.
You can see how current and voltage behave across the operating range of the PV string.
For larger systems or difficult faults, this can help a qualified technician narrow down the problem more accurately.
What If There Is No Visible Shading?
This is an important point.
No visible shading does not mean there is no reason for the low current.
If shading has been reasonably ruled out, move to the next possibilities:
- Uneven soiling
- Poor connector
- Cable problem
- String fuse problem
- Damaged module
- Internal module connection problem
- Bypass-diode issue
- Incorrect string configuration
- MPPT or inverter operating condition
- Incorrect measurement
This approach prevents you from jumping straight to replacing expensive solar panels.
Example: One String Is Producing Less Current
Imagine a solar installation has several similar strings.
Most strings are producing around 10 A, but one string is producing only 7 A.
There is no obvious tree or building shade.
Instead of immediately replacing the panels, the technician can investigate:
First: Confirm the measurement.
Next: Compare the string with the other strings under similar sunlight.
Then: Check the panels for dirt or physical problems.
After that: Inspect the connectors, cables and string protection.
Next: Compare the string’s operating voltage with the other strings.
If the current remains low, more detailed testing can then be used to determine whether the problem is associated with a module, bypass diode, connection or another part of the system.
This method is better than guessing because each test helps narrow down the possible causes.
Common Mistakes to Avoid
Replacing the panels immediately
A low-current reading does not prove that the panels are bad.
Comparing strings under different sunlight
A cloud passing over one string can make the comparison meaningless.
Looking only at amperage
Voltage provides another important piece of information.
Assuming no large shadow means no shading
Small or temporary shadows can still affect a PV string.
Ignoring connectors
A poor connection can create significant power loss and may create local heating.
Testing live PV equipment without proper training
Solar strings can produce dangerous DC voltage in daylight.
Electrical troubleshooting should be carried out by someone who understands PV systems and uses the correct safety procedures.
For installation and commissioning checks, see our guide on what a solar installer should test before handing over a system in Nigeria.
Final Answer: What Should Be Investigated?
If low amperage is seen on a combined solar string without significant visible shading, investigate the string systematically rather than assuming that the panels are defective.
Start by confirming the measurement and comparing the affected string with similar strings under the same conditions.
Then investigate:
- Hidden or temporary shading
- Dirt and uneven soiling
- MC4 connectors and other connections
- Cables and terminations
- String fuses
- Damaged or weak solar modules
- Bypass-diode problems
- Incorrect string configuration
- MPPT or inverter operating conditions
- Measurement errors
If the problem remains after these basic checks, a qualified solar technician may need to perform more detailed voltage, current, thermal or I-V curve testing.
The main lesson is simple:
Low string current is a symptom, not a diagnosis.
The current reading tells you that something deserves investigation. The combination of current, voltage, sunlight conditions and further testing is what helps identify the actual cause.
Frequently Asked Questions
Why does one solar string have lower amps than another?
If the strings are designed the same and are operating under similar conditions, a significant current difference can indicate a problem such as soiling, shading, a damaged module, poor connection, fuse problem or another string-level fault.
However, differences in irradiance, temperature and inverter operating conditions should be ruled out first.
Can a bad MC4 connector cause low solar current?
Yes. A poor, damaged, corroded or high-resistance connection can cause voltage drop and power loss.
Can a bad bypass diode cause low solar panel output?
Yes, a bypass-diode problem can contribute to abnormal PV performance. However, low current by itself does not prove that the bypass diode is faulty.
Voltage, I-V behavior and, where appropriate, thermal inspection can provide more evidence.
Should I replace the solar panel if one string has low amps?
Not based on the current reading alone.
First confirm the measurement and investigate shading, soiling, connections, fuses, wiring, string configuration and other possible causes.
Why is solar string voltage important when troubleshooting low current?
Current and voltage provide different clues.
A string can have a plausible voltage while still having a problem that prevents it from delivering normal operating current.
Comparing both measurements with similar strings helps narrow down the fault.
Is low solar current always caused by shading?
No.
Shading is only one possible cause. Dirty panels, damaged modules, poor connections, cable faults, string fuses, bypass-diode problems, configuration issues and measurement errors can also cause abnormal current readings.
Is it safe to disconnect solar panel connectors to test the string?
Not unless the person doing the work is trained and follows the correct PV isolation and electrical safety procedure.
Solar panels can continue producing dangerous DC voltage in daylight. For advanced string testing, use a qualified solar technician with suitable equipment.
Related SolarPriceNG Guides
If you are troubleshooting a larger solar system problem, these guides can help:
- Why Are My Solar Panels Producing Low Power? — broader solar-output troubleshooting.
- Solar Charge Controller Not Charging Battery? — for problems involving the controller and battery charging.
- Solar Charge Controller Calculator — for planning controller size.
- What Should a Solar Installer Test Before Handover in Nigeria? — useful when checking a newly installed system.